Sunday, 19 October 2014

Invisible Decrease Tutorial


For my amigurumi patterns, I have always used an invisible decrease technique. I find it gives a much tidier and cleaner finish, leaving no holes whatsoever!

Amigurumi tend to need to be crocheted fairly tight, so none of the stuffing shows through, however when I've used the conventional way of decreasing my stitches, it always leaves these big gaps, that ruin the look for me!

This is a tutorial which shows in visual, and written format, how to do the invisible decrease. 

I hope you find you can use this way of working two stitches together, and produce the nice, clean look that I adore to use in all my crocheted cuddlies!

Enjoy!


Step 1;
Insert your hook into the front loop only of the next single crochet stitch, 

Step 2;
Without yarning over, swing your hook to the next stitch along, and pick up that front loop. 
(You will now have three front loops on your hook, your two front loops, plus your original loop).

Step 3;
Yarn over and draw through the two front loops on your hook.

Step 4;
You will now have two loops on your hook.

Step 5;
Yarn over, and pull through both the remaining loops.

Step 6;
Woohoo! Invisible decrease complete!


You should now have such a beautiful decrease, that it's pretty difficult to spot! 
So a big piece of advice that I've learnt while decreasing continuously in a round? Keep count! Because unless I'm really concentrating, I lose where I've decreased! 

Hope you found this tutorial clear and easy to follow, and I hope you enjoy using it for your lovely pieces of crochet work! 

Monday, 13 October 2014

Whisp, the Friendly Ghost - Free Pattern

Whisp the Friendly Ghost


This is my little friendly ghost, Whisp. He hovered in the other night and he was so cute, I just had to share him with you all!

He is a very easy pattern to pick up, the head and body are all one piece so you only have to attach the arms! (Just how I like it, because I hate extra stitching!) All you need is your crochet hook, some yarn, eyes (I used 9mm safety eyes), and a yarn needle.

The gauge or type of yarn you use wont be important for this project, because Whisp is an amigurumi (crocheted/knitted stuffed toy). You just need to make sure you stitches are tight, so the stuffing wont show through, so choose your hook to suit whichever yarn you decide to go with.

Helpful Info;

  • This pattern is worked in a continuous rounds.
  • I use the US crochet terminology.
  • All the instructions should be continued and repeated around, until you reach your stitch marker.
  • I have used the magic circle to begin Whisp, however if you dont know how to do a magic circle, you can easily find some great tutorials on YouTube!
  • For the Eyes, I have placed the eyes in between rounds 9 and 10, with six stitches between them.
  • To give the eyes a bit more definition, I attached a small amount of the main coloured yarn through the back of the head. Poking it through the very inner edge of one of the eyes, then going back in the head two stitch down. Pull the yarn out the back of the head (same hole as original) and then carry the yarn back inside the ghost across to the other eye, repeating the step and pulling slightly to indent the inside of the eyes. (This process may need repeated once or twice until you are happy with how it looks). Then simply push the yarn needle back through the original hole at the back and tie off.


Whisp Pattern

Head & Body
1)      MC with 6sc (6)
2)     inc in each st around (12)
3)     1sc then inc in next st (18)
4)     2sc then inc in next st (24)
5)     3sc then inc in next st (30)
6)     4sc then inc in next st (36)
7-10)      sc around for four rows (36) Insert safety eyes between round 9 & 10
11) 4sc then invdec (30)
12) 3sc then invdec (24)
13) 2sc then invdec (18)
14-15) sc around for two rows (18)
16) 1sc then invdec (12) Stuff head

Body
17)   sc then inc in next st (18)
18)   2sc then inc in next st (24)
19)   3sc then inc in next st (30)
20-22)   sc around for three rows (30)
23) 3sc then invdec (24)
24) 2sc then invdec (18)
25-26) sc around for two rows (18)
27) sc around in the back loops (18) Finish stuffing body
 - Invdec around until closed, FO.

Arms
     1) MC with 6sc
     2-8) sc around for 8 rows, FO

I have stitched the arms directly under the neckline, tilting them inwards slightly so they lie closer to the centre of the body, instead of sticking out. I haven’t stuffed my arms


I hope you enjoy making your very own ghost for Halloween, or maybe just because? :-)
If you do get one made, please feel free to share your lovely creations with me on my facebook page, Bugsy's Burrow. I would love to see them!

Sunday, 5 October 2014

Sweetheart Kitty Cat

A pretty little kitty made her way onto my crochet hook during the month of September. She's the latest addition to my Sweetheart collection, and I love her!


I'm a big fan of cats anyway, with one of my own at home, and I wanted my crocheted version to be as cute as possible, but also looking unique too. 


I have been making a few different shades for customer orders, and for my own happiness too!


The Sweetheart Kitty Cat pattern is up in my Ravelry store, as well as in my 'patterns' tab on this blog. 

http://www.ravelry.com/patterns/library/sweetheart-kitty-cat


Saturday, 30 August 2014

One small step for Moon Mouse.....

He has been tested, a few minor *cough* corrections made, and now he is all ready!


I really have had a love/hate relationship with making this little guy. I loved the challenge when my customer commisioned him from me, and thought, 'yep, looks easy enough, he's going to look great!'. 
Unfortunately, he was so painfully frustrating to get 'just right'. 
I had an idea, and image in my head, but the stitches just weren't falling in the right places, and his shape didn't look quite right.

I am a bit of an OCD perfectionist, I wanted him to look good, I mean, really good. Not only for me, and my own pride, but more importantly, the client waiting for him!


I knew I wanted his pattern to be fairly straightforward, so the nose, head and body needed to be one piece. - I hate sewing things together anyway, so I wanted to reduce that step as much as possible.

The first experiment looked okay - he was only a first draft so his colouring didnt matter. But that was a good thing, as it made me focus more on his shape. 

A few adjustments noted, and I started on my second mouse. Optimistic, so I chose the right colouring. As I've mentioned in my previous post, he needed a shorter nose, and to be a bit podgier!


There is a lot of perseverance in designing a pattern. By that, I don't mean in patience, and just plodding on with something I dislike, but more, I need to have faith that what Im doing will start to look right, and come together the further I go. 

The finishing touches really make an amigurumi perfect in my mind, and luckily, the longer I crocheted, the more confident I felt.


By the end of the project, I was pretty happy with him! Although, sitting him next to a photo showing the original Clangers, he was taller and still slimmer in comparison. But, as my hubby complimented, he looked 'cuter'! Well that sealed the deal, and the more I look at my Moon Mouse, the more I agree!


Modest of me I know! But as I said to my customer, when it gets to the point when I'm so pleased, I'm actually gutted I have to give a project away, thats when I know it's finished.

Speaking of which, I have had to start another couple of Moon Mice to help fill the void this lovely guy will leave when he travels to his new home!
<Violins softly playing...> ;-)


 His pattern was sent off, and then reviewed and checked by several testers. Now, it's all tidy and hopefully, mistake free!


This is the link for his pattern in my Ravelry store. He is the only crocheted Clanger that I've seen so far, as originally, the Clangers were actually knitted toys used for the TV series. So I'm happy to have made a crocheted version!


Tuesday, 26 August 2014

Editors choice!

Eeek! Bless my lovely Moon Mouse! He won Editors choice! 

I know he's my creation, but I always feel, when I've finished an amigurumi, that they do come to life. They develop a character. 

Yes, they start with my sketch, and then some yarn knotted together in a fancy and complicated way, but when the last few stitches go in, and the face is completed, they become something else. 

Soppy and silly I know, I've always had a weird attachment to my projects! (A bit like Dr Frankenstein perhaps!) But Mr Moon Mouse really has been electrocuted by something and has come to life! 


His pattern is being tested at the moment, and they should be finished by this Saturday. So fingers crossed there aren't too many mistakes!

I am very proud of Mr Moon Mouse! I hope he continues to recieve lots of love and adoration!
This award goes to you, you lovely pink guy you! 

Saturday, 23 August 2014

Moon Mice have landed


Well, a huge and loud 'Tadaaa!' He's finally finished, and I have to say (with a huge cheesy grin), that I'm really pleased! 


Technical Stuff
 His body, head and nose, are all one piece. So its an easy pattern for all levels of skill.
I think, if I wanted him to look downwards a bit more, I could easily just 'pull' in the rounds underneath his neck by placing a straight stitch downwards and tugging it gently together.

However, for my Moon Mouse, I like him looking upwards and happily stargazing.
I quite like the simplicity of this Mouse's armour.
For Experiment number one, I attached a thread across all the 'plates' of armour, to make them look attached and more realistic.

I think however, it ended up looking too busy and messy. So I'm a lot happier with the modified uniform for Experiment Mouse number two!


Its simpler, its gives the desired affect, and all whilst looking fabulous!


Here they both are, cousins from different moons across the galaxy! The mouse on the left, lives on a moon with less sun rays, and more chocolate - Thats my kind of moon! 

Here is the authentic, official photograph of the Moon Mouse landing. 
Our earth isn't quite the same as his home on a distant moon, but I hope he'll be happy here! Hopefully more of his friends will be landing soon ;-)

Monday, 18 August 2014

My Moon Mice


I have been asked to make a Clanger! 
Although they weren't showing in my childhood, I certainly remember the cute pink space mice with fondness, and their awesome whistling language.


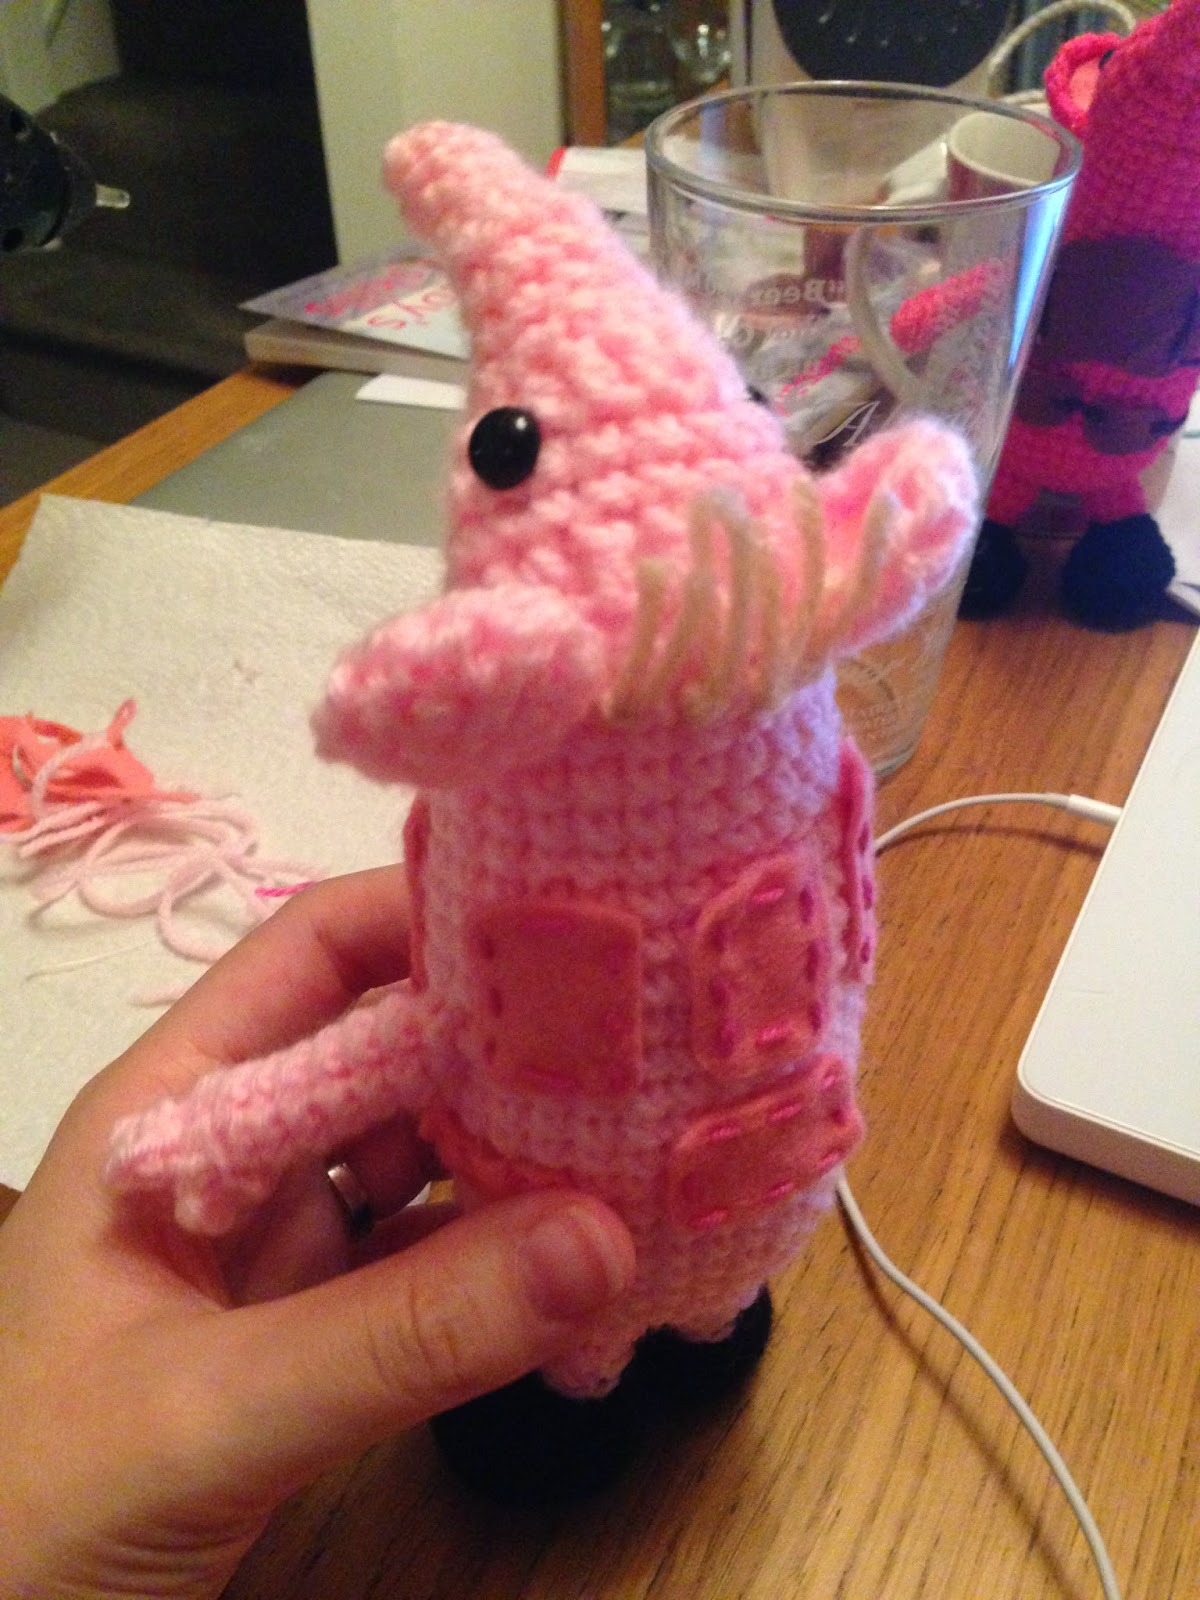
I started looking for an existing pattern for the Clanger, but unfortunately, they are all knitted, and I can't knit! I couldn't find a single pattern, so I decided to make my own. Seemed simple enough. >cough<

I happily got the feet done... then got onto the rest! I like my patterns to be as straightforward and easy to make as possible. So I wanted to make the nose, head and body as one piece. As you can see, I got pretty frustrated with making the nose and head... I frogged that piece... ALOT.


Eventually, after lots and lots and lots of attempts, I came up with my Moon Mouse, experiment number one! 

Obviously, I just used any pink I had, hence why this guy looks rather sunburnt. He also has wayyy too big a nose, and needs to eat some cake!

To finish him fully, I'm just adding some hair and fingers. Then I need to get his armour completed and attached properly. At the minute, its just pinned in - although I do quite like the mulitcoloured pins and the effect it gives... Hmmm!


For my next Moon Mouse - experiment number two, he will hopefully be a closer 'Clanger' colour, and fatter! 

Stay tuned, and I'll update with more Moon mouse news soon!

Sunday, 27 July 2014

Sweetheart Bunny has joined the shelf!

His pattern has been finalised and tested, and now he's sat beside the Sweetheart Teddy!


I really like this bunny, little rabbits have always been cute to me! I've highlighted my favourite features for my pattern too, big feet with the soft foot pads! As well as puffy cheeks!


I've changed the pattern by giving the bunny a puff stitch nose - sweet and button like, just like the real thing! 


And of course, its still the dinky handheld size, adding to the cuteness alert! 


Its lovely seeing him on parade in Ravelry. Like the teddy, the bunny has been smartened up with the tidy ribbon, and a flower headpiece. Got to please those window shoppers! So hopefully, someone will fall in love, and want to adopt one of their own!

For the link to the Bunny Rabbit's pattern, please look in my 'Patterns' section.


Good luck my little Sweetheart Bunny Rabbit! 

Thursday, 24 July 2014

Sweetheart Bunny Rabbit


Well here it is! The next in my 'Sweetheart' series. I've given this bunny a pretty flower pin, puffy cheeks and big feet!

He's being tested at the moment, then by this Saturday when I've got the all clear, I can publish the pattern onto Ravelry!

I've got two other little sweetheart animals in mind, so very eager to get started on those too!


Thursday, 3 July 2014

She's alive!!!

After recieved A LOT of love and requests for this little teddy on a great facebook page, 'Creative Crochet Crew - The Group', I got my skates on and posted my pattern onto Ravelry!!!

The pattern is now live and just looking so lovely sitting there! I hope she gets lots of admirers! Not only is she very special being designed for my baby girl, this is my first written pattern, and the meaning behind that for me, is just huge! 

Like my webpage description, its a serious 'DO' for me and I couldnt be happier!

My next step is to attach a proper link to my Ravelry account on my page, but in the meantime, here is the link to my Sweetheart Teddy!

http://www.ravelry.com/patterns/library/sweetheart-teddy

Tuesday, 1 July 2014

Sweetheart Teddy


 My first ever pattern! I wrote the pattern down for my 'Sweetheart Teddy', and I'm rather pleased!

I designed her around the time of my baby shower while I was pregnant with my daughter. I hadn't made any clothes or toys, but wanted to make something special and personal, just for her. 
So, this little teddy was thought up. Now my daughters here, It makes it even more special a pattern, as my baby girl is my darling sweetheart, cute and pink!

I have been anxiously awaiting my pattern to be tried and tested by crochet pattern testers this week. I wanted to be sure the pattern read clearly and was easy to understand before I posted it officially!


These lovely little guys have been crocheted by my testers
I cant explain how good it made me feel, to see my own design worked up into a 3D figure by someone else! Its such an amazing buzz!


Its everything I could have hoped for and more!
I cannot wait to see the others and share them with you!

Thursday, 26 June 2014

First post!

And so Bugsy's Burrow is born!

I've been wanting to create this for a long, long time, but there was always something in the way, and plenty of 'ill get around to it' moments. But finally, here we are, and I'm writing my first ever blog post! Hurray!

So, here's my plan of action. At the moment, I'm working on my first crochet amigurumi pattern, and I'm very pleased! Its one thing to follow someones beautiful pattern and make something lovely, but to have your own idea in your head, then make it 3D, is pretty amazing!

I will continue to make and design patterns, and I aim to update on my blog with pictures and info regularly and show my progress! Cant wait! So exciting!